Applying the Logic App Overview Workbook Template to Logic Apps Standard
- Jeff Wessling

- Jun 2, 2025
- 5 min read
Updated: Sep 9, 2025
Bringing clarity and control to Logic App operations with Azure Workbooks
This post is part of our Logic Apps Observability series. See Part 1 on enabling Application Insights v2 telemetry, and Part 3 on customizing the workbook for multi-workflow monitoring.

Every Logic App developer eventually faces the same question: How do I support these workflows in production? Traditional run histories only go so far, and anyone with BizTalk experience misses the old Group Hub reporting. Enter the Logic App Overview Workbook Template, a powerful, customizable Azure Workbook designed to provide the visibility and operational control that teams need for Logic Apps Standard.
This workbook consolidates telemetry, status, and tracked properties into one place, giving operations staff and developers a central hub for monitoring, troubleshooting, and improving reliability.
Insight: Deploying and Applying the Workbook
The Logic App Overview Workbook Template was created by Rohitha Hewawasam of Microsoft’s Logic Apps product team and is available through the Azure portal. It first appeared on the Microsoft AIS Blog: See the original post and the updated version. I first found it via Kent Weare’s YouTube video, Episode 177, which demonstrated custom dashboards using Azure Workbooks and Application Insights.
Once deployed and linked to Application Insights v2 telemetry, it provides:
Subscription Level Visibility: Select your subscription, Application Insights instance, and Logic App Standard instance.
Workflow Level Filtering: Narrow results to specific workflows or statuses.
ClientTrackingID Search: Quickly locate workflow runs by tracking identifiers.
With these filters in place, the workbook displays workflow instances, their statuses, and links for deeper troubleshooting. Unlike the native run history, it offers an enriched view, including tracked properties and shape level action details, all within a single operational dashboard.

How to Deploy
Ensure your Logic App Standard is configured for v2 Application Insights telemetry
On your Azure Subscription
Create a New Resource
Search for Custom Deployment
Select Create

On the Custom Deployment resource
Select, Build your own template in the editor

Replace the JSON with Rohitha's
Click Save the persist the JSON
Update Azure Project and Instance details before clicking Review and Create

Create
What You’ll See and Why It Matters
When you configure and filter the workbook, here is what you will experience:
Workflow Runs at a Glance: A list of workflow instances with status icons and direct links to details.
Action Level Insights: Grids that expand on failure, showing tracked properties and error details.
Quick Troubleshooting: Resubmit and diagnostic links surfaced directly in context.
These filters make it simple to isolate failed runs or search by tracking identifiers. The workbook then presents runs with clear visual indicators and links for deeper analysis. Clicking on a run expands to show shape level actions, their statuses, and any tracked properties, helping you investigate failures without fully opening the workflow instance.
Overall, this makes the workbook more powerful than the native Run History view. Teams can monitor message flows, troubleshoot faster, and respond effectively in day to day operations.
Apply It
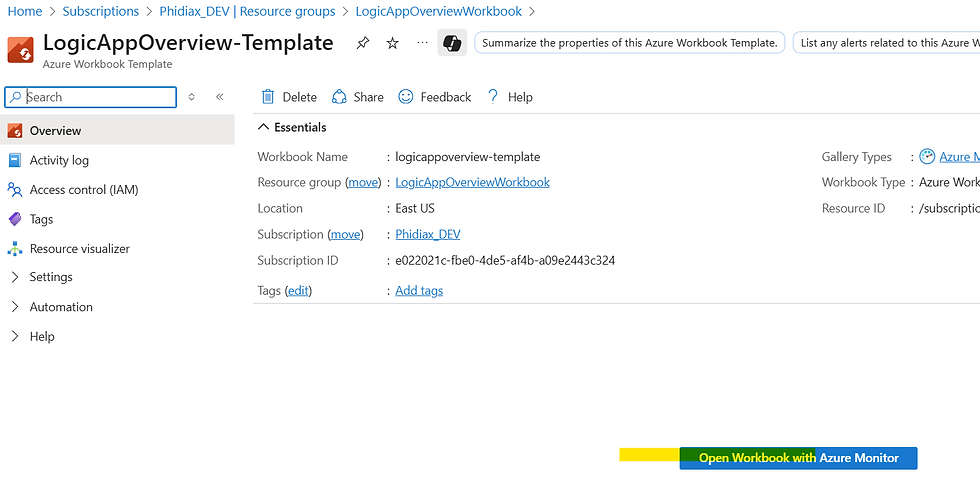
Using Azure Portal, navigate to the newly deployed Azure Workbook Template. Select Open Workbook with Azure Monitor.
Select:
Your Azure subscription
The Application Insights instance
The Logic App Standard instance
A time range to review

From there the next level of options are
Your choice of workflow
Workflow status
ClientTrackingID

This is great because it allows you to filter by workflow run status (ie. show me only failed runs) or you can search by the ClientTrackingID if you have assigned that in the workflow trigger Settings.

With these selections made, the workbook shows all the instances that match that criteria. Pretty cool! From here you can see important information about the workflow run with graphic icons indicating their status. It provides links to open the workflow instance for troubleshooting and to resubmit the workflow if needed, just like the Workflow’s native Run History page (actually better in my opinion). But that’s not all…
Clicking on any row opens another table grid below that lists all the shape actions performed and their statuses. Clicking on any of these opens a side context pane that shows specific information to the shape. This is particularly useful if you are investigating a failed run, but don’t want to completely dig into the workflow instance. This view also allows any Tracked Properties to be displayed so that functionality can be put to better use.

By clicking any of the shapes additional information is revealed in a table below for either successful tasks or exceptions.

Truly this workbook brings some much-needed functionality to Logic App Standard instances for monitoring them, finding out information of messages flowing through them, and responding to them in an operational capacity.
However, Microsoft only meant this workbook template as a starting point with the expectation that solution providers would adapt it for their own projects and make It better. That was where we found ourselves on a recent project and handily the workbook proved to be quite modifiable even by someone with limited experience with Azure Workbooks, Application Insights, and the Kusto Query Language (KQL).
The Workbook template won’t let you save to the template itself. Save a version of it as a new Azure Workbook with the steps below to use a starting point for the modification to be added.
Click the ‘Save’ icon.

This will prompt a ‘Save As’ context pane to open where you can enter needed information to save your changes to a new Azure Workbook. The only problem with this is the new workbook will be saved with a guid as the primary name in the Azure Portal and the name of the Workbook in parentheses.

Outcomes: What you Gain
Consolidated Monitoring: Replace fragmented views with a single pane of glass, cutting support effort and reducing time to resolution.
Rapid Troubleshooting: Empower teams to resolve issues in minutes rather than hours, protecting uptime and reducing escalation costs.
Better Use of Tracked Properties: Expose business identifiers (like OrderId or CustomerId) so business users and IT teams can quickly trace impact on operations.
Operational Confidence: Give leadership assurance that integrations are monitored consistently and governance standards are being met.
Related Posts in This Series
This article is part of our Logic Apps Observability series. Explore Part 1 on enabling Application Insights v2 telemetry, and Part 3 on customizing the workbook for multi workflow monitoring.
Ready to Simplify Monitoring and Boost Reliability?
Azure Workbooks provide the foundation, but real value comes from tailoring them to your needs. Phidiax architects extend these templates with multi workflow views, enhanced formatting, and custom KQL queries so your teams gain clarity faster, reduce risk, and resolve issues with confidence.

