ELMAH (Error Logging Modules and Handlers) is a great open source tool for automating logging errors from MVC websites to allow later review of errors without showing the details to the end users. I prefer to use the XML File target on the off-chance that the database goes down and that needs logged (Logging database errors to the down database just doesn’t work like I would hope it would), which means that the files can build up and need to be regularly pruned to keep the ELMAH viewer page responsive and manageable. When you have server control, that can be a simple batch job away. I recently had the opportunity to setup an Azure based web site in MVC with ELMAH providing an error logging view the administration section of the website. Since this is an Azure site, I couldn’t just setup a batch on the hosting server to clean house regularly.
Using Azure Automation
Azure Automation provides a great way to schedule PowerShell scripts in the cloud, but none of the default built-in cmdlets seem to be able to directly hit the file system of an Azure website. I started thinking about deployment options for Azure Web Sites that might allow access to the files, and it became obvious.
Building a script to cleanup these files would be as simple as creating a PowerShell script to FTP into the web site’s App_Data folder and delete items that were older than desired. To keep things simple, I decided to just download the file list (not the file list details) from the FTP server, making sure that the ELMAH configuration just puts the date into the filename. So to accomplish what was needed, I would build a PowerShell script to perform the following, and use Azure Automation to schedule it:
- List the files in the FTP Server App_Data directory
- Process the list using RegEx to find the date in each file name, and determine if it is older than 14 days old
- Send the FTP Delete command for the file when it is older than 14 days
The following is the sample source code or the PowerShell script. The script makes use of the System.Net’s FtpWebRequest objects to make the FTP server requests and stores the FTP credentials in encrypted Azure AutomationVariables.
PowerShell Source Code
workflow Script {

  inlineScript {

    $sFtpServer = Get-AutomationVariable -Name 'sFtpServer'
    $sUser = Get-AutomationVariable -Name 'sUser'
    $sPW = Get-AutomationVariable -Name 'sPW'

    $countDelete = 0
    $countNotDelete = 0

    if ($sFtpServer.Substring($sFtpServer.Length) -ne '/')
    {
        $sFtpServer = $sFtpServer -join '/'
    }

    $listGet = [System.Net.FtpWebRequest]::Create($sFtpServer)
    $listGet.Method = [System.Net.WebRequestMethods+Ftp]::ListDirectory
    $listGet.Timeout = 120000
    $listGet.Credentials = New-Object -TypeName System.Net.NetworkCredential -ArgumentList $sUser,$sPW

    #Get List of directory
    $listResult = $listGet.GetResponse()

    $streamReader = New-Object -TypeName System.IO.StreamReader -ArgumentList $listResult.GetResponseStream()

    $lstResults = $streamReader.ReadToEnd().split("`n`r")

    ForEach ($fileName in $lstResults)
    {
        $thisDate = [System.Text.RegularExpressions.Regex]::Match($fileName, '(19|20)\d\d-(0[1-9]|1[012])-[0-9][0-9]').Value

        If ($thisDate -And $fileName.Contains('error') -And $fileName.Contains('.xml'))
        {
            If ([System.DateTime]::Parse($thisDate).CompareTo([System.DateTime]::Now.AddDays(-14)) -lt 0)
            {
                $deleteGet = [System.Net.FtpWebRequest]::Create($sFtpServer+$fileName)
                $deleteGet.Method = [System.Net.WebRequestMethods+Ftp]::DeleteFile
                $deleteGet.Timeout = 120000
                $deleteGet.Credentials = New-Object -TypeName System.Net.NetworkCredential -ArgumentList $sUser,$sPW

                Write-Output "Deleting $sFtpServer$fileName"

                $deleteResult = $deleteGet.GetResponse()

                If ($deleteResult.StatusCode -eq [System.Net.FtpStatusCode]::FileActionOK)
                {
                    Write-Output "Status Deleting $fileName " $deleteResult.StatusDescription
                    $countDelete = $countDelete + 1
                }
                Else
                {
                    Write-Output "Status Deleting $fileName " $deleteResult.StatusDescription
                }
            }
            Else
            {
                Write-Output "New enough to keep, Not deleting $fileName"
                $countNotDelete = $countNotDelete + 1
            }
        }
    }

    $lstResults = $null

    Write-Output "Deleted $countDelete, Left $countNotDelete"
  }
}
Azure Automation Script Setup
Note before beginning: Depending on the file volume, site scale and bill level (i.e. Free to Standard), you may find the script exceeding the free monthly minutes if there is a large volume of files present. As a result, it may be beneficial to clean house to within 15 days in advance of testing the script provided below. This will mean that the testing process will not use up all available free minutes, but there will still be old enough files to ensure the script’s proper functionality.
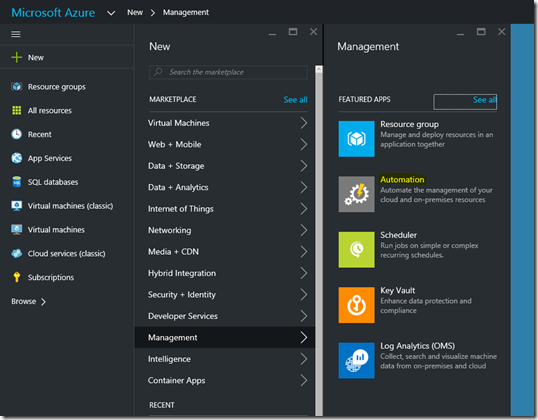
Begin by logging into your Azure account in the new Azure Portal, and create a new Automation Account resource:
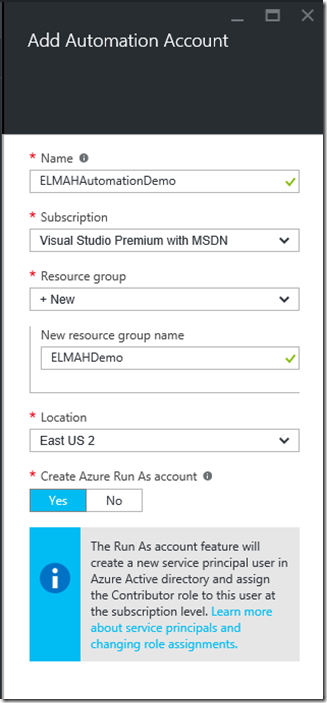
Create the new Automation Account and Resource group if desired:
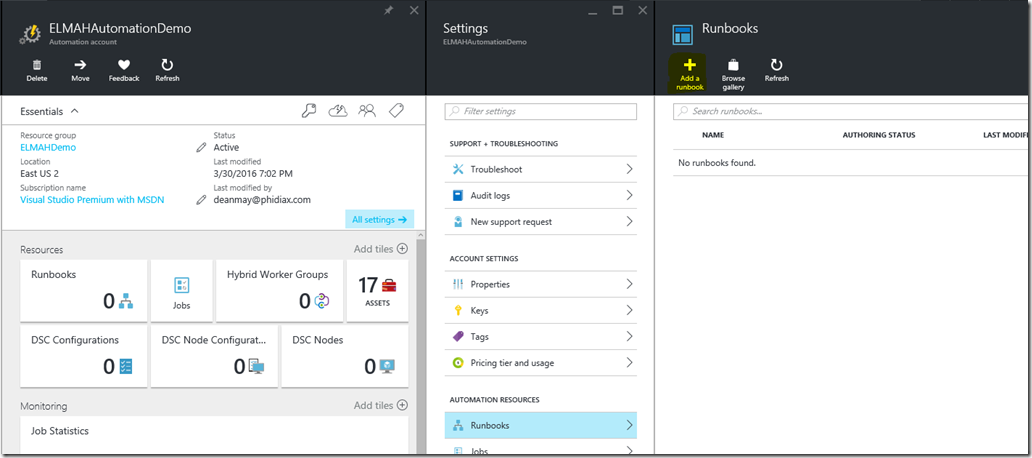
Once the Automation Account is completed, you will need to open the Automation Account and Add a Runbook of the Powershell Workflow type (this is keeping inline with the old Azure Portal, which at this time accepts only Workflow scripts):
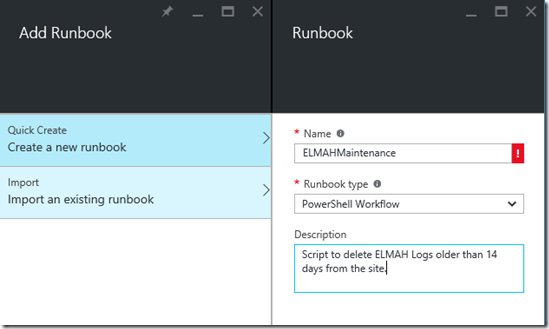
After creation completes, you will be automatically taken to the editing window for entering the PowerShell script. Paste the above complete inlineScript element into the Workflow scope and save:
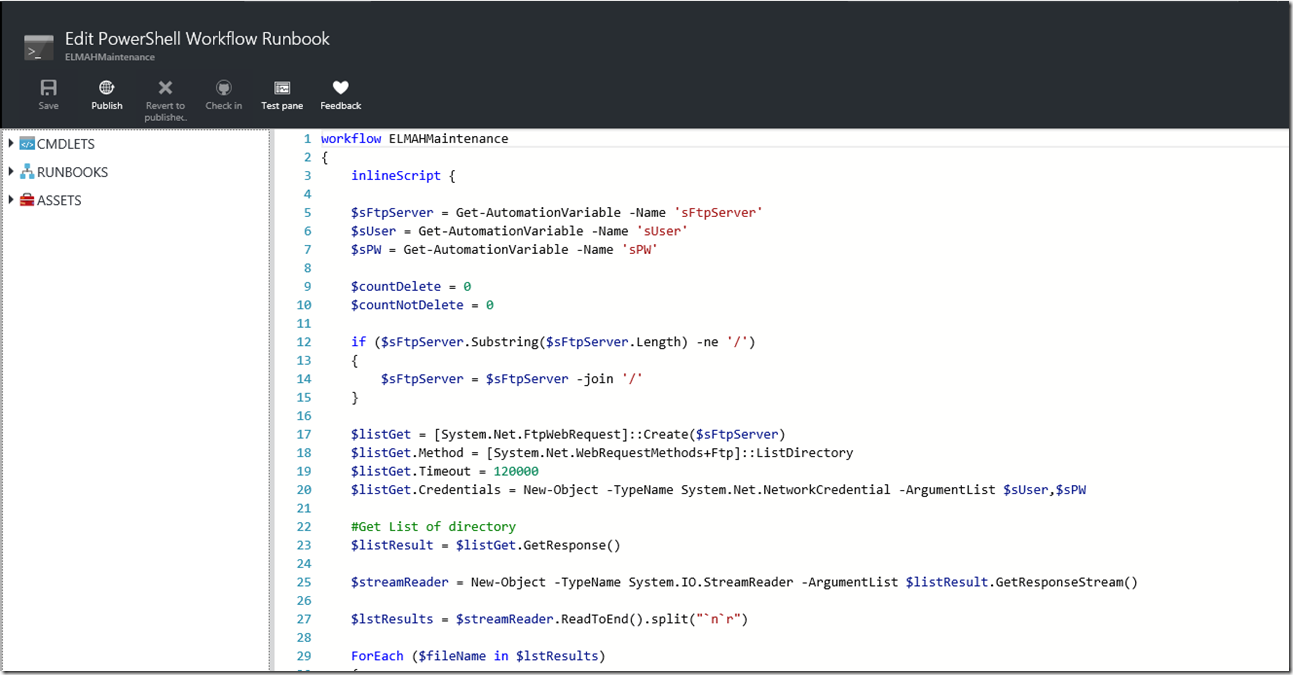
The script makes use of AutomationVariables in Azure, which should now be added to indicate the FTP Server, Username, and password used within Azure for the site publishing information where the ELMAH File maintenance needs to be performed. To obtain this, we need to download the site’s publish profile and review that file (as XML) to find the FTP username and password. Open the Web App in Azure Portal and click Get Publish Profile and save the resulting file:

Open in your favorite XML editor and review the element with the publishMethod of FTP. You will need the publishUrl (with “/App_Data/” appended), the userName, and userPWD from that element:

Return to the Automation Account and open the Assets section, and the Variables section of Assets. Here you can add the three variables as follows, using the data from the publish profile indicated above (including the addition of “/App_Data/” to the publish URL to only delete ELMAH related data files). It is advisable to encrypt the username and password settings using the Encrypted option at the bottom:
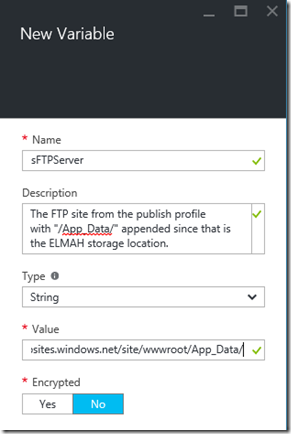
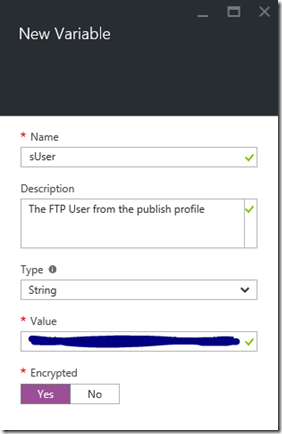
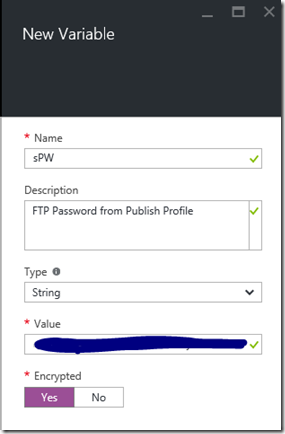
To avoid disclosing sensitive information, note that in the variables view, the encrypted items are hidden:
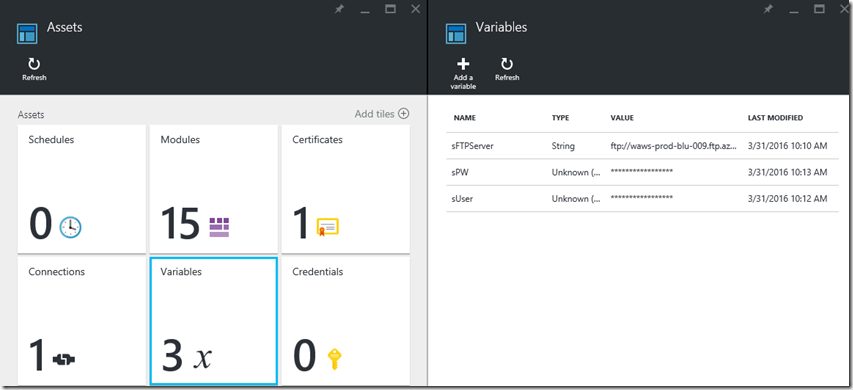
The variables and draft version of the PowerShell script are now setup. To complete the setup and be able to schedule, we need to test and publish the script. Return to the runbook edit screen and click the Test Pane button:
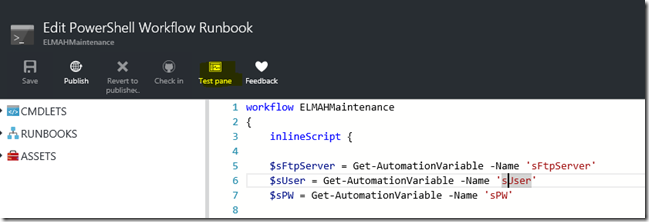
This test pane will allow us to run the script to ensure it properly outputs and completes as expected. The output is directed to the window for viewing as well. In addition, reviewing the FTP site App_Data contents before and after run will assist in ensuring a successful result. Reviewing the App_Data folder shows the oldest contents to be dated 2016-02-23:
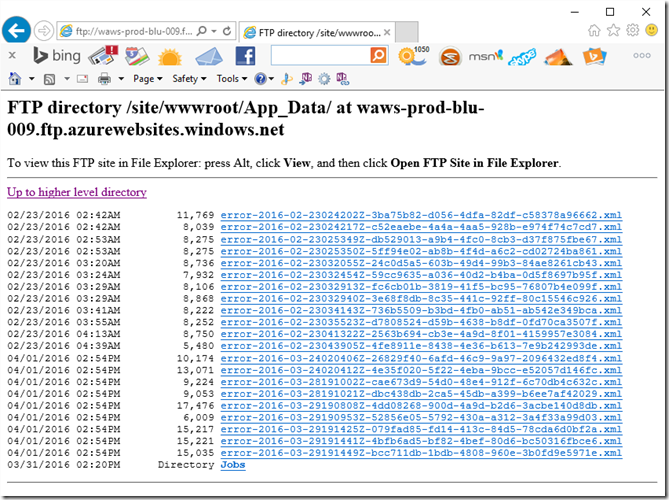
The test run will be performed on 4/1/2016, so we would expect that the oldest file upon completion would be from 2016-03-18 and newer. With that expectation in mind, we kick off the testing of the script and await the results (Note that the results are stored, so returning to the site at a later time will not cause the results to be lost):
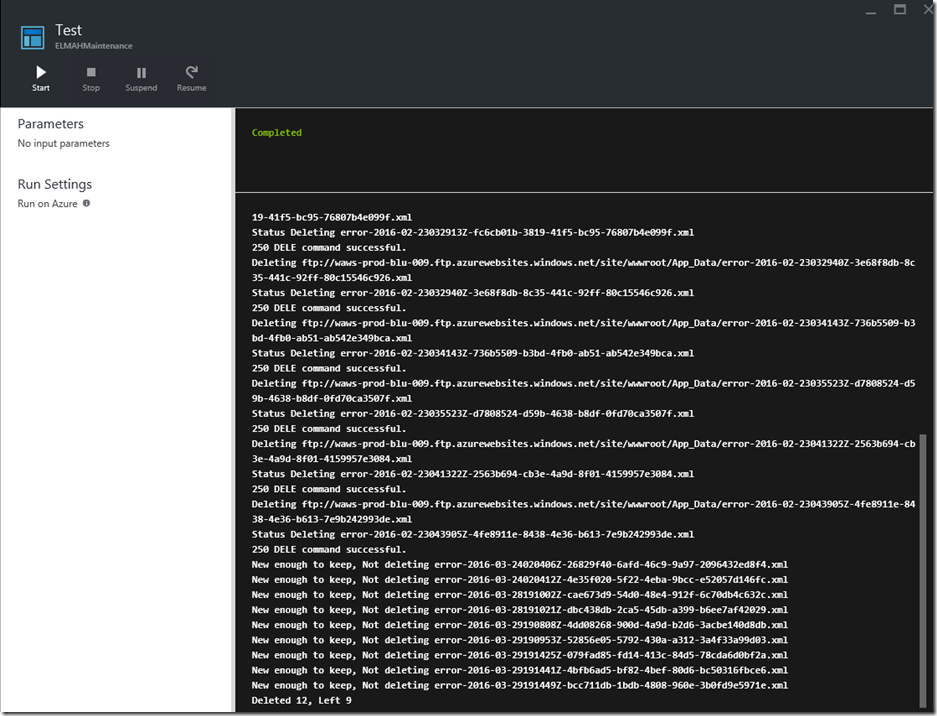
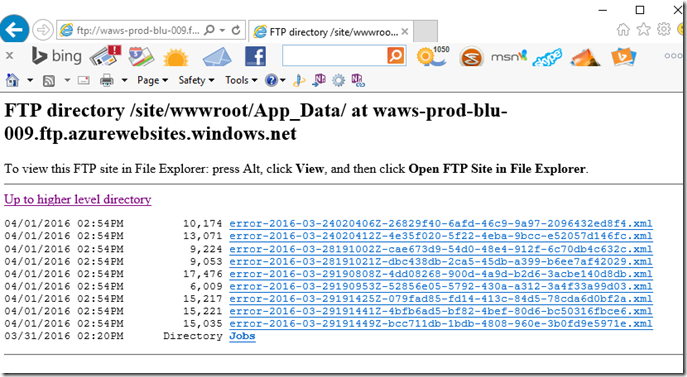
As you can see by reviewing both the output and the FTP contents, the items which were ELMAH log files (beginning with error and having an xml extension) and newer than 14 days old based on the date within the filename were kept, each of those older triggered an FTP delete command whose results are written to the output.
Note that at this time, it appears that the Azure FTP Sites will return items in alphabetical order, so provided you have ELMAH using a YYYY-MM-DD date format, it is possible to cut down on processing time used by adding a break in the script at the first time that the “new enough to keep” logic is hit. This would be ideal if this script will be scheduled to run infrequently, or large amounts of error files are expected.
Now that we have a valid and tested script, the next step is to Publish the runbook so it is available to the job scheduler. On the editing screen, select Publish:
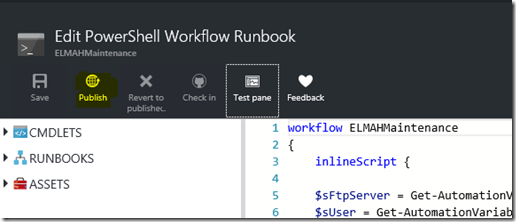
This now enables all previously disabled options for the runbook, which will allow it to be scheduled.
Azure Automation Script Scheduling
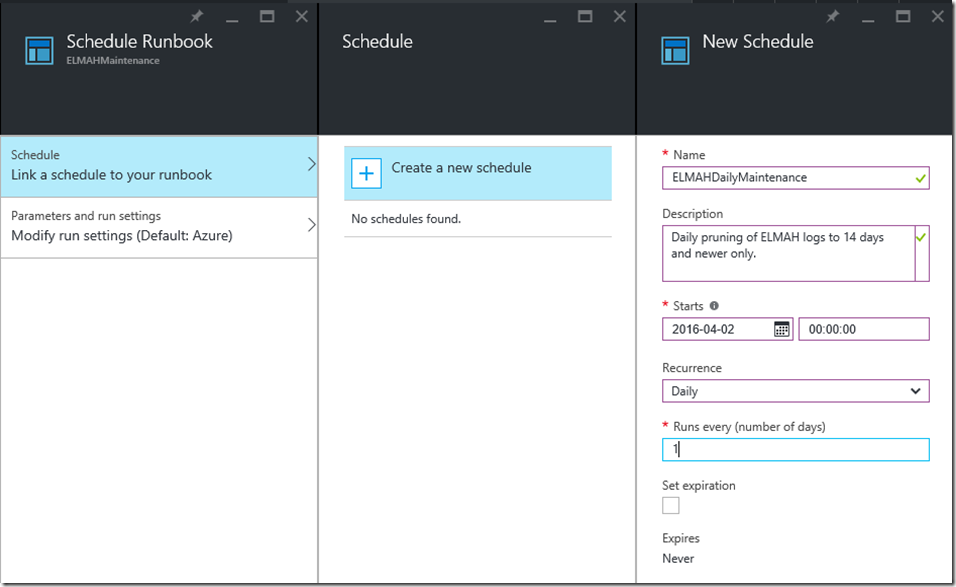
Click the now-enabled Schedule button on the runbook. From there, you need to Link a schedule to your Runbook, and Create a New Schedule. In this example, I am setting it to run every day at midnight (to keep it outside of business hours):
The Schedules tile now shows that the runbook is linked to a schedule which is enabled:
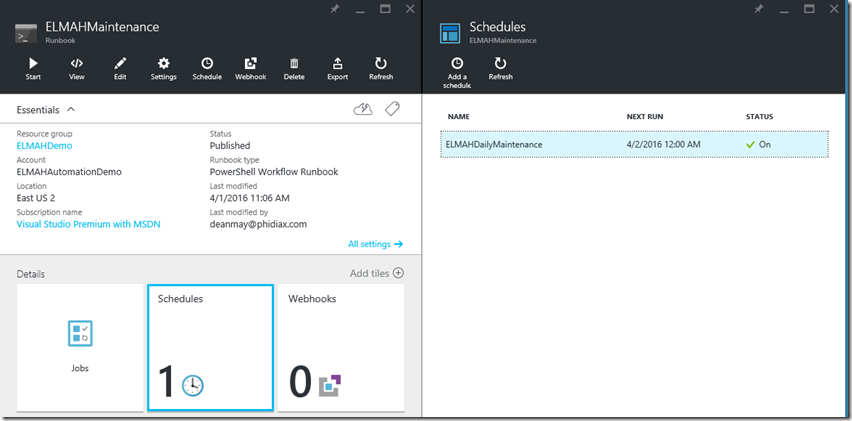
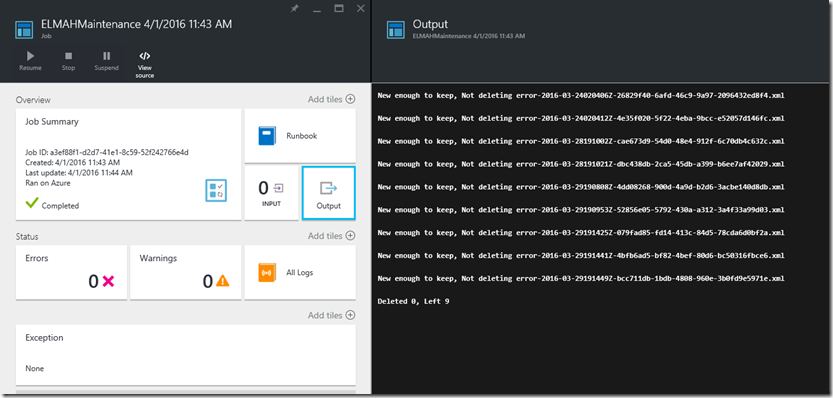
In addition to scheduled runs, you can manually run by clicking Start. When you view the job this creates, you will still have access to view the output as well to verify the functions or any errors that may occur:
I hope this summary and walkthrough will help those who use ELMAH with an MVC site on Azure and choose to log to files keep those error logs manageable. Obviously this barely scratches the surface of what can be accomplished using Azure Automation, especially when your data center is the cloud.


